> ## Documentation Index
> Fetch the complete documentation index at: https://ship.paralect.com/docs/llms.txt
> Use this file to discover all available pages before exploring further.
# Render
There is a simplified type of deployment where you can try to deploy Ship for free using [Render](https://render.com).
This type allows you to set up infrastructure faster and doesn't require additional DevOps knowledge from the development team.
You can switch to a more complex Kubernetes solution when your application will be at scale.
It's a step-by-step Ship deployment guide. We will use [Render](https://render.com) with a managed PostgreSQL database and [Redis Cloud](https://redis.com/try-free/) for data storage, and [Cloudflare](https://www.cloudflare.com/) **(optional)** for DNS and SSL configuration.
You need to create [GitHub](https://github.com/), [Render](https://render.com), [CloudFlare](https://www.cloudflare.com/) and [Redis Cloud](https://redis.com/try-free/) accounts.
Also, you need [git](https://git-scm.com/) and [Node.js](https://nodejs.org/en/) if you already haven't.
## Setup project
First, initialize your project. Type `npx create-ship-app init` in the terminal then choose desired build type and **Render** as a cloud service provider.
```bash theme={null}
npx @paralect/ship init
```
You will have next project structure.
```shell theme={null}
/my-app
/apps
/web
/api
/.github
...
```
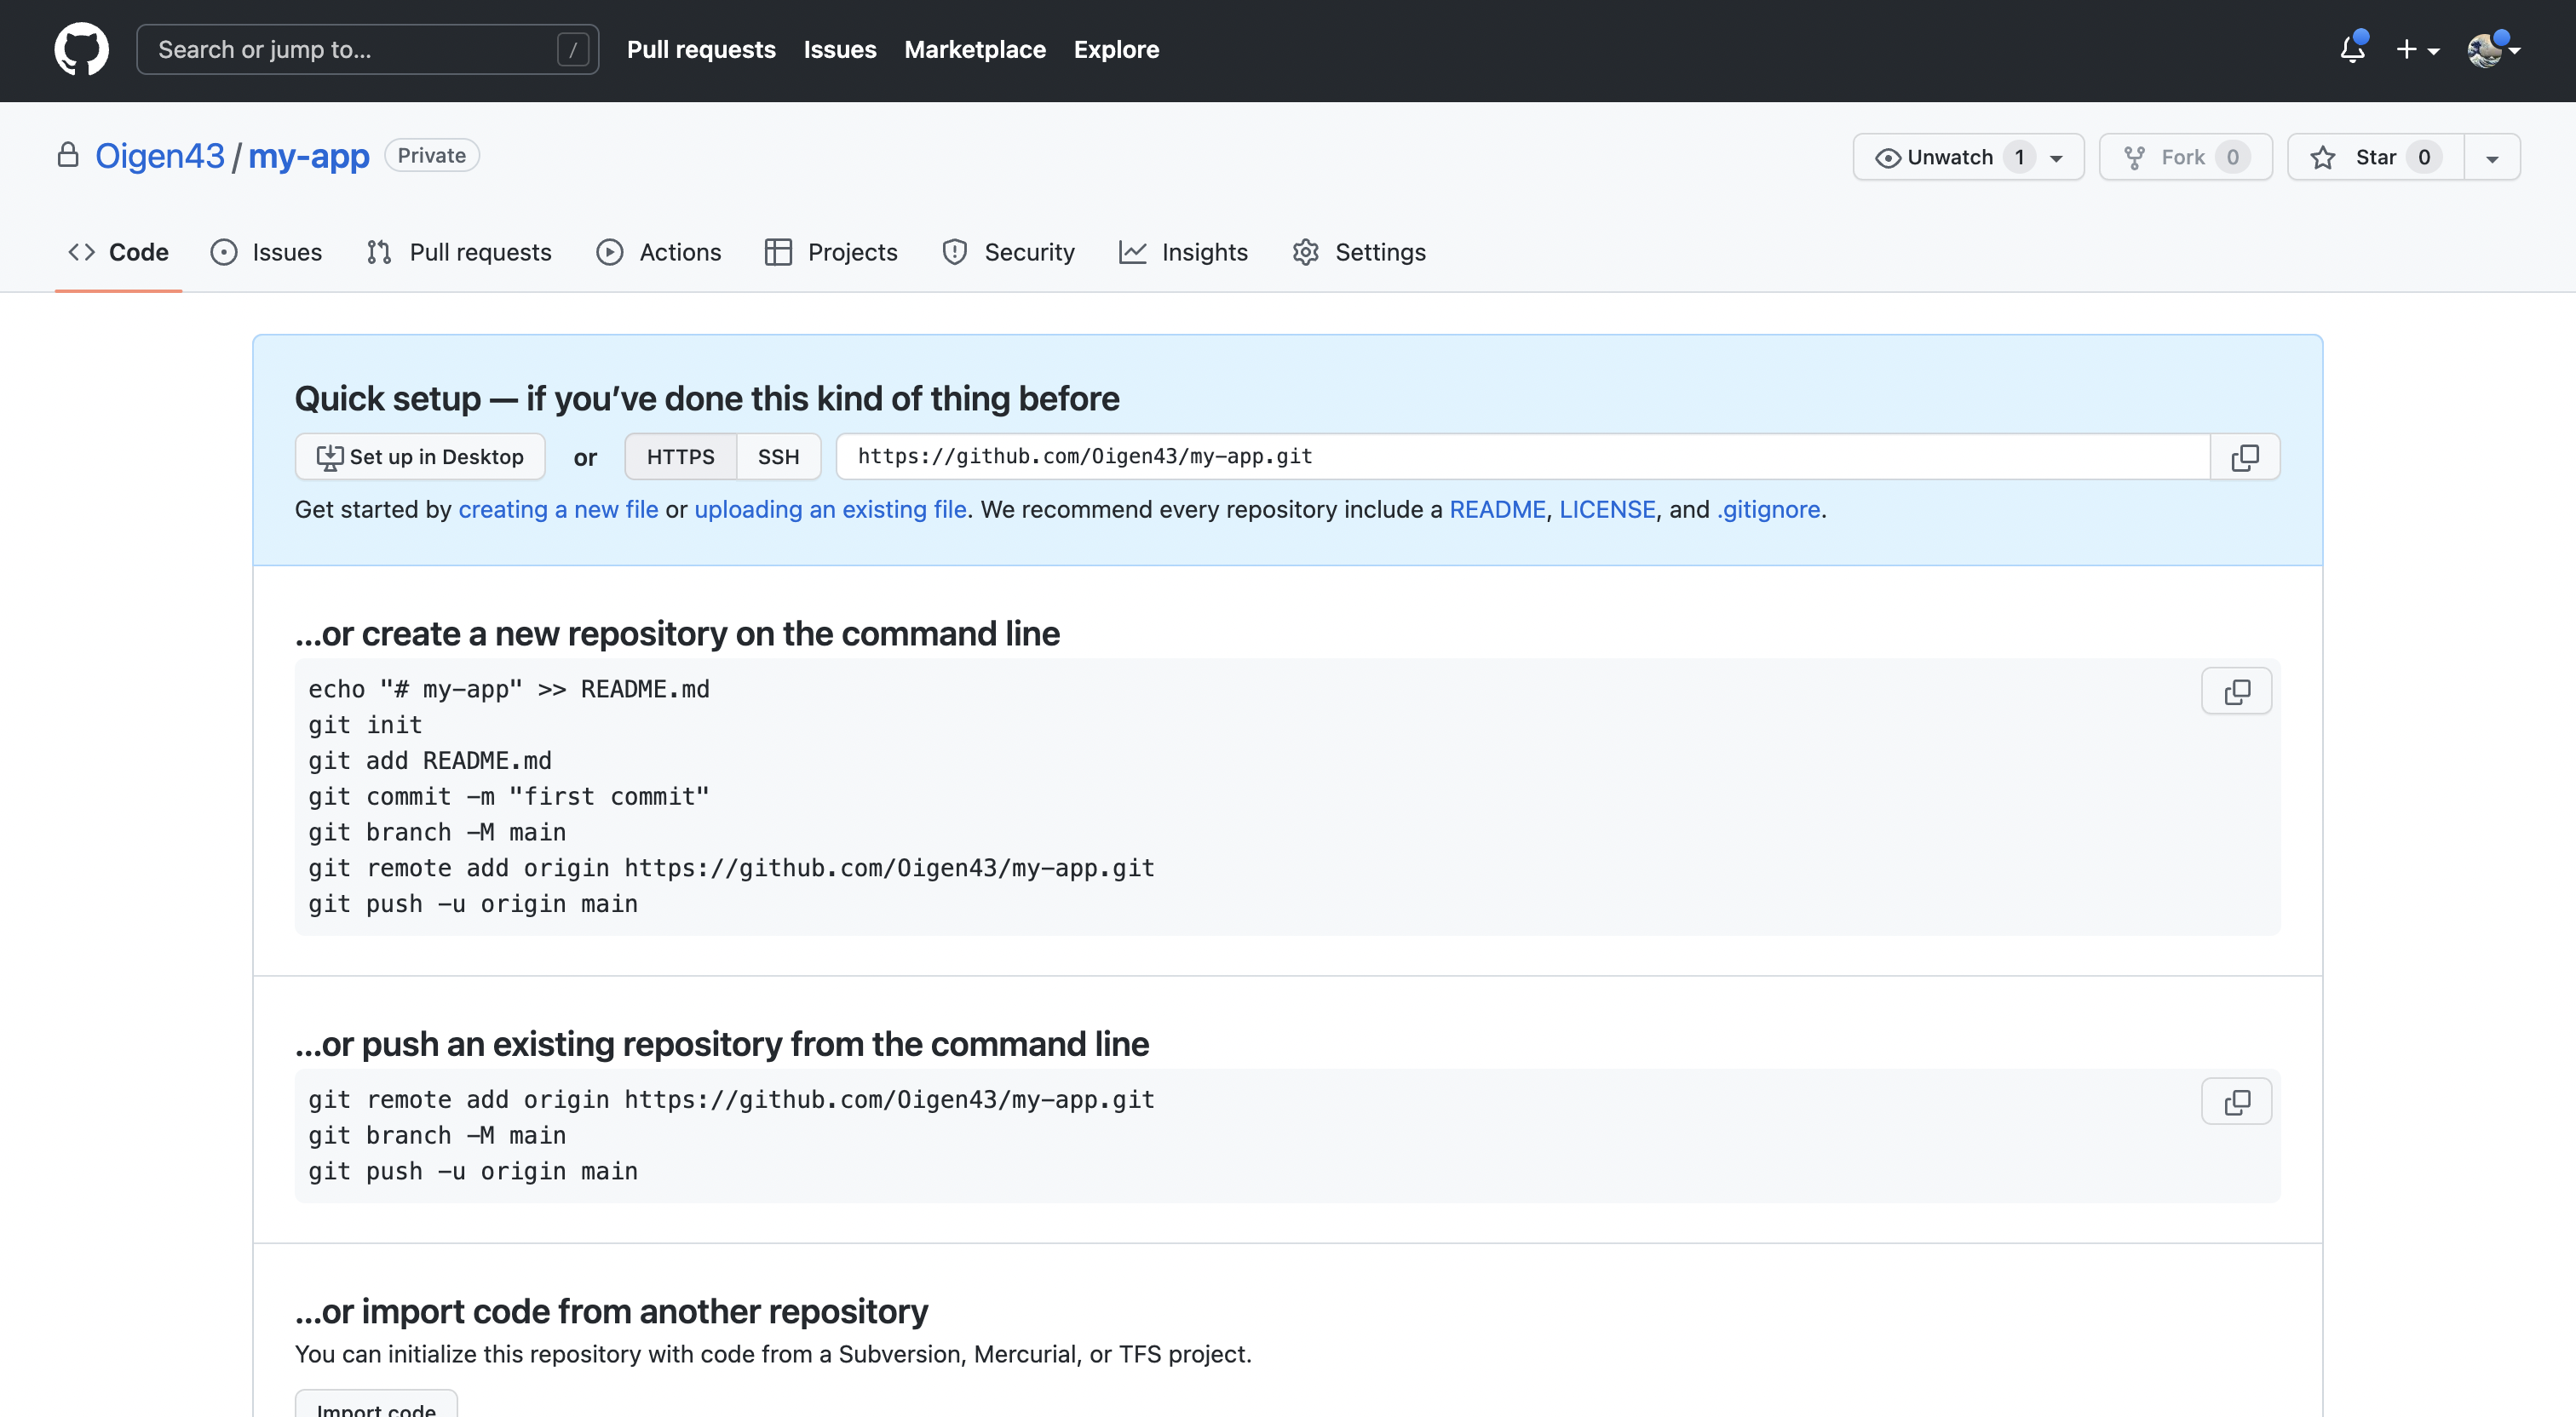
Create GitHub private repository and upload source code.
 ```shell theme={null}
cd my-app
git remote add origin https://github.com/Oigen43/my-app.git
git branch -M main
git push -u origin main
```
## PostgreSQL
Ship runs on PostgreSQL via Drizzle ORM. Render offers a managed PostgreSQL instance you can provision in a few clicks.
### Database creation
1. In the [Render Dashboard](https://dashboard.render.com/), click `New` and select `PostgreSQL`.
2. Enter a database name and select a region. We recommend the same or closest region to your services.
3. Select an instance plan. The free plan is enough for staging/demo environments. For production, pick a paid plan that includes automated backups.
4. Click `Create Database`.
### Connection
After the database is provisioned, open its page and copy the `Internal Database URL` (for services hosted on Render) or the `External Database URL`. This is your `DATABASE_URL` connection string in the form `postgresql://user:password@host:port/dbname`.
Save this value. You'll set it as the `DATABASE_URL` environment variable on the API service later.
Before moving to production, enable automated backups on your PostgreSQL instance so you can reliably restore your data in the event of unforeseen circumstances.
## Redis Cloud
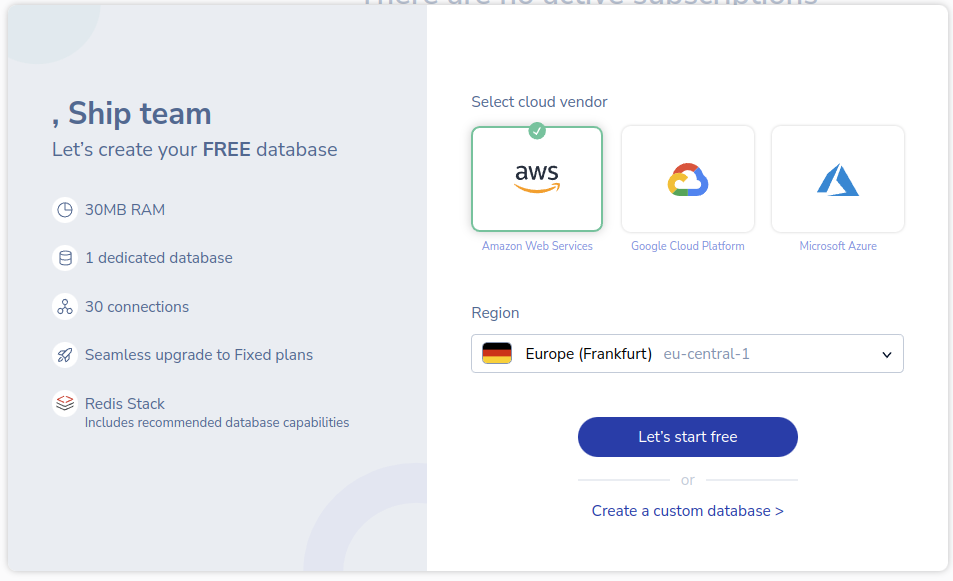
Navigate to [Redis Cloud](https://redis.com/try-free/) and create an account. Select cloud provider and region, then press `Let's start free` to finish database creation.
```shell theme={null}
cd my-app
git remote add origin https://github.com/Oigen43/my-app.git
git branch -M main
git push -u origin main
```
## PostgreSQL
Ship runs on PostgreSQL via Drizzle ORM. Render offers a managed PostgreSQL instance you can provision in a few clicks.
### Database creation
1. In the [Render Dashboard](https://dashboard.render.com/), click `New` and select `PostgreSQL`.
2. Enter a database name and select a region. We recommend the same or closest region to your services.
3. Select an instance plan. The free plan is enough for staging/demo environments. For production, pick a paid plan that includes automated backups.
4. Click `Create Database`.
### Connection
After the database is provisioned, open its page and copy the `Internal Database URL` (for services hosted on Render) or the `External Database URL`. This is your `DATABASE_URL` connection string in the form `postgresql://user:password@host:port/dbname`.
Save this value. You'll set it as the `DATABASE_URL` environment variable on the API service later.
Before moving to production, enable automated backups on your PostgreSQL instance so you can reliably restore your data in the event of unforeseen circumstances.
## Redis Cloud
Navigate to [Redis Cloud](https://redis.com/try-free/) and create an account. Select cloud provider and region, then press `Let's start free` to finish database creation.
 Open database settings and get the database public endpoint and password.
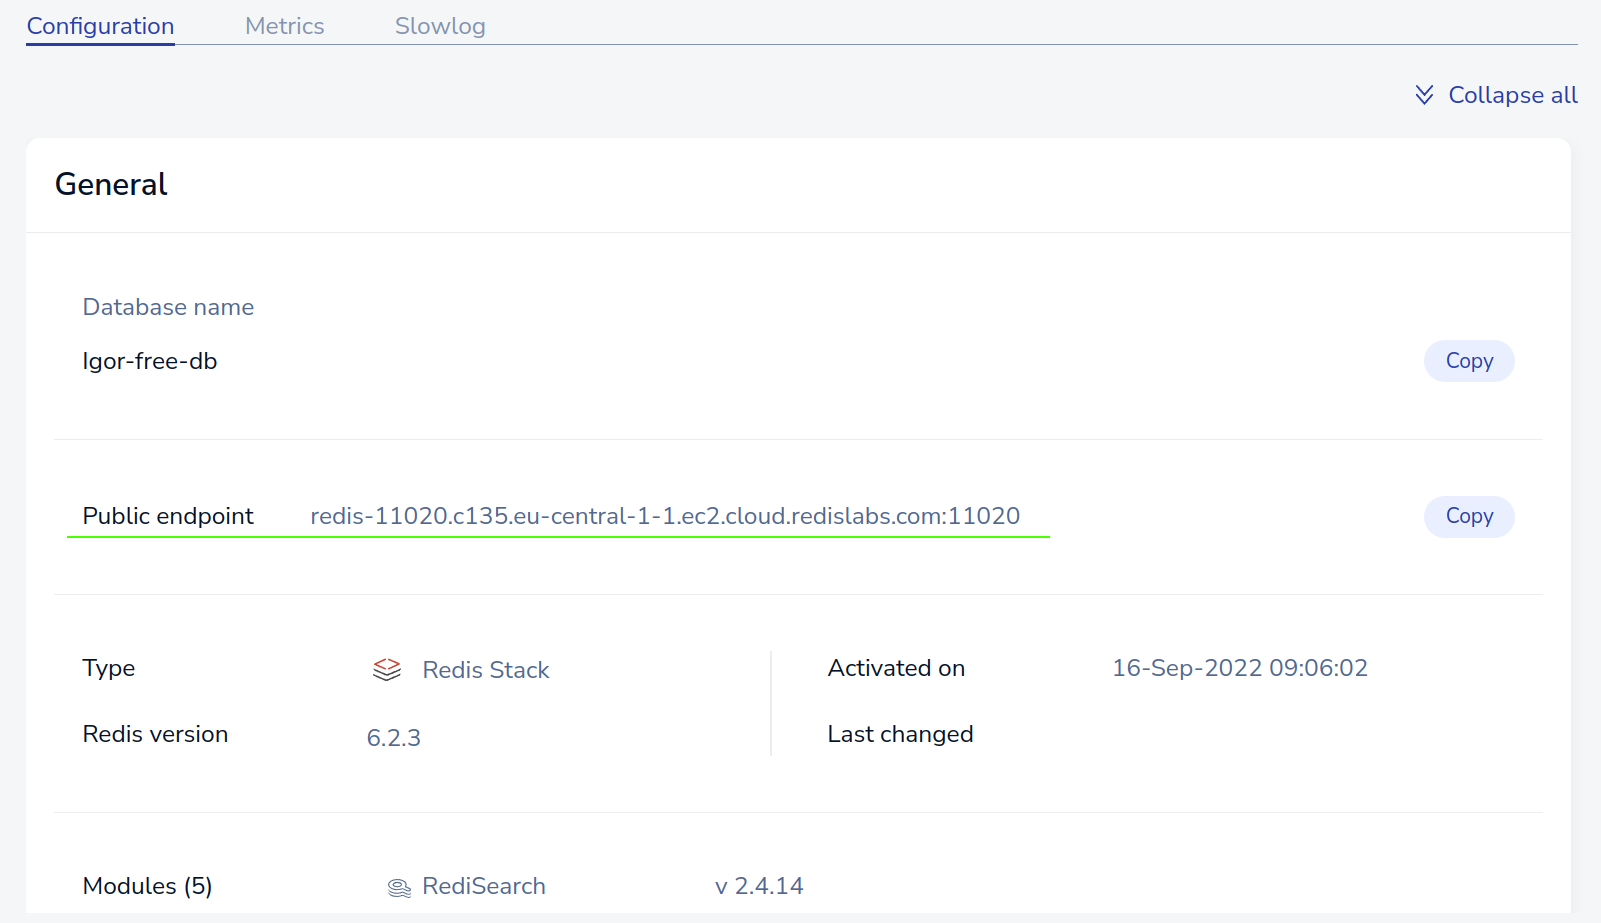
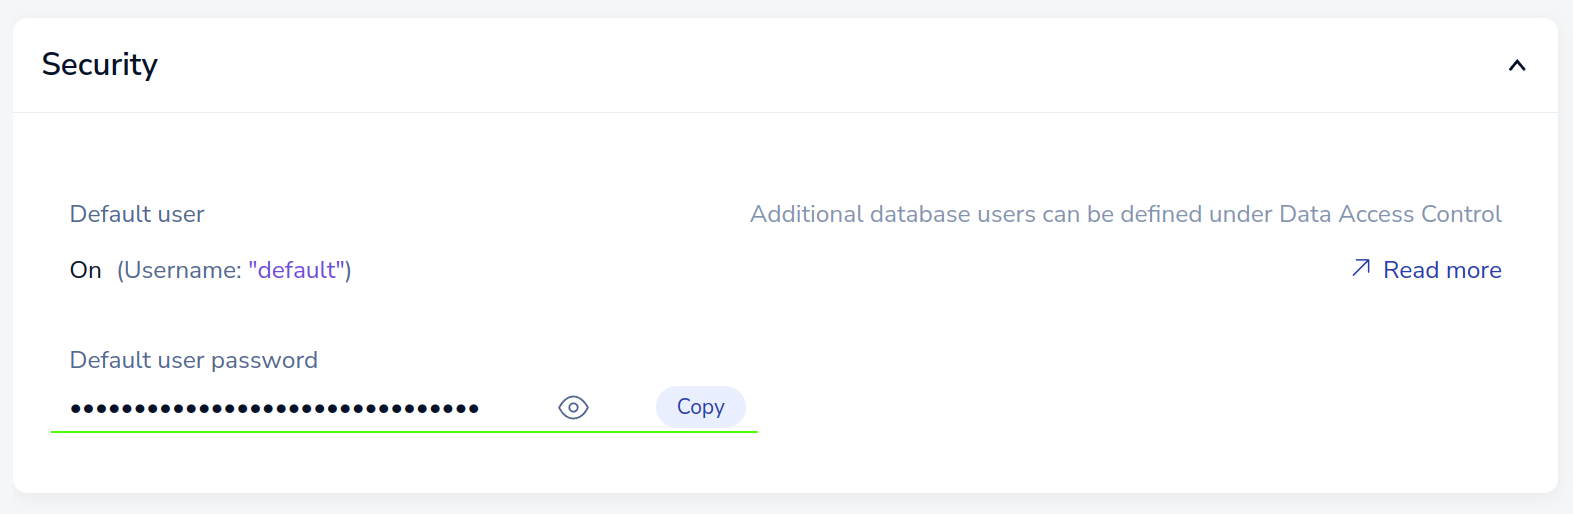 Form Redis connection string using public endpoint and password `redis://:`. Save this value. It will be needed later when creating the app in Digital Ocean.
## Render
Navigate to the [Render Dashboard Panel](https://dashboard.render.com/) and select the **Blueprints** tab.
The `Full-Stack` build type requires 2 applications. First for the [Web](/docs/web/overview) (TanStack Start) app and second for the [API](/docs/api-reference/overview), plus the Migrator and Scheduler services that run alongside it.
The Migrator applies Drizzle migrations (`pnpm --filter api migrate`) before each deploy, and the Scheduler runs background jobs (`pnpm --filter api schedule`). Both share the API image and need the same `DATABASE_URL` and `REDIS_URI` values.
Form Redis connection string using public endpoint and password `redis://:`. Save this value. It will be needed later when creating the app in Digital Ocean.
## Render
Navigate to the [Render Dashboard Panel](https://dashboard.render.com/) and select the **Blueprints** tab.
The `Full-Stack` build type requires 2 applications. First for the [Web](/docs/web/overview) (TanStack Start) app and second for the [API](/docs/api-reference/overview), plus the Migrator and Scheduler services that run alongside it.
The Migrator applies Drizzle migrations (`pnpm --filter api migrate`) before each deploy, and the Scheduler runs background jobs (`pnpm --filter api schedule`). Both share the API image and need the same `DATABASE_URL` and `REDIS_URI` values.
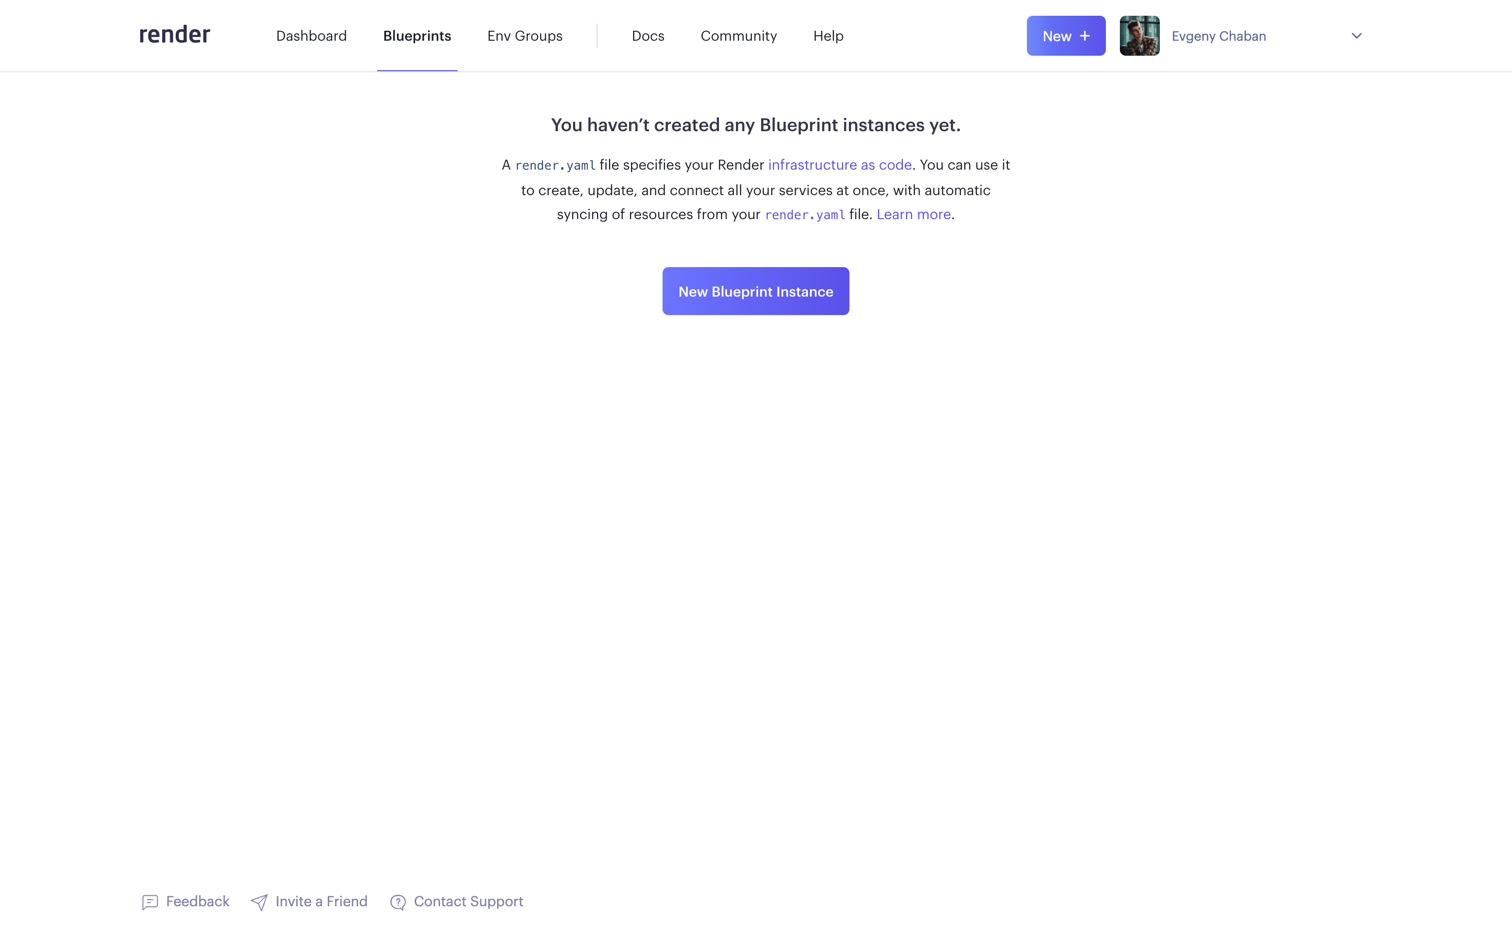 Ship provides an easy way to deploy your applications using [Infrastructure as Code (IaC)](https://render.com/docs/infrastructure-as-code).
You can learn more about [Blueprint Specification here](https://render.com/docs/blueprint-spec).
Review your `render.yaml` file in the application root directory and make some corrections if necessary.
Click on the **New Blueprint Instance** button and **connect** the appropriate repository with Ship.
Ship provides an easy way to deploy your applications using [Infrastructure as Code (IaC)](https://render.com/docs/infrastructure-as-code).
You can learn more about [Blueprint Specification here](https://render.com/docs/blueprint-spec).
Review your `render.yaml` file in the application root directory and make some corrections if necessary.
Click on the **New Blueprint Instance** button and **connect** the appropriate repository with Ship.
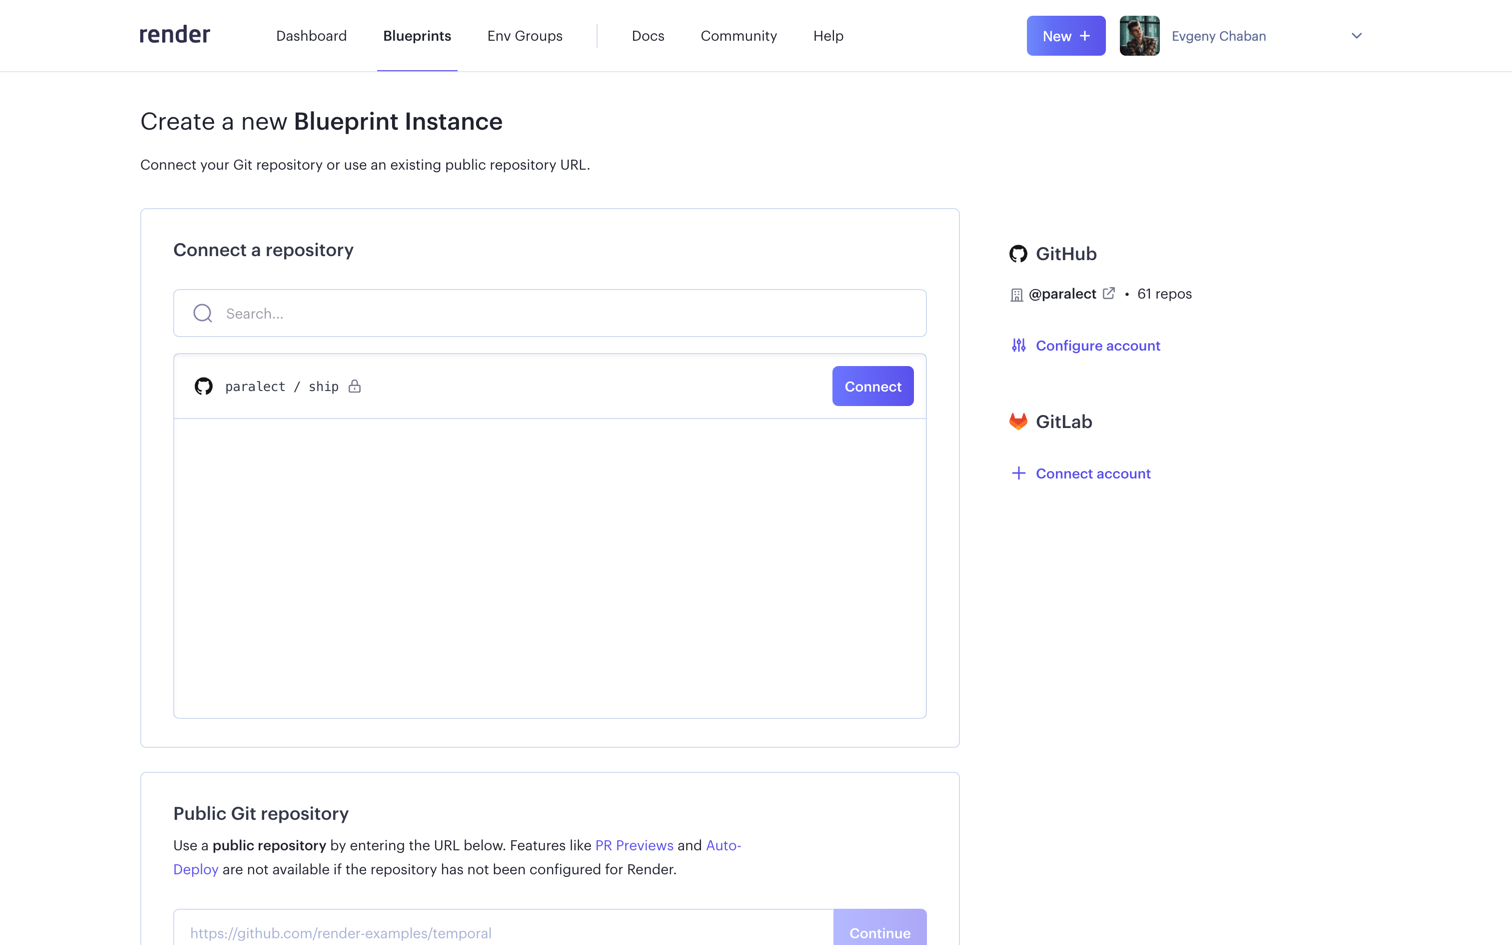 Specify a name for your Blueprint instance, select a branch, and review the changes to apply them.
**Apply** changes if you are satisfied with everything.
Specify a name for your Blueprint instance, select a branch, and review the changes to apply them.
**Apply** changes if you are satisfied with everything.
 ### Environment variables
The `APP_ENV` environment variable is typically set based on the environment in which the application is running.
Its value corresponds to the specific environment, such as "development", "staging" or "production".
This variable helps the application identify its current environment and load the corresponding configuration.
For the web application, by setting the environment variable `APP_ENV`,
the application can determine the environment in which it is running and load the appropriate configuration file:
| APP\_ENV | File |
| ----------- | ---------------- |
| development | .env.development |
| staging | .env.staging |
| production | .env.production |
These files hold the client config for each environment. The web app is built with Vite, so client-side variables are prefixed with `VITE_` and read through `import.meta.env` (for example `VITE_API_URL`, `VITE_WS_URL`, `VITE_WEB_URL`). They are baked in at build time, so make sure the values in your `.env.{environment}` files are up to date and committed before you deploy.
In contrast, the API utilizes a single `.env` file that houses its environment-specific configuration.
This file typically contains variables like API keys, secrets, or other sensitive information.
To ensure security, it's crucial to add the `.env` file to the `.gitignore` file,
preventing it from being tracked and committed to the repository.
So just specify the environment variables that will contain the values of your secrets.
For example, if you have a secret named `API_KEY`,
create an environment variable named `API_KEY` and set the value of the corresponding secret for it.
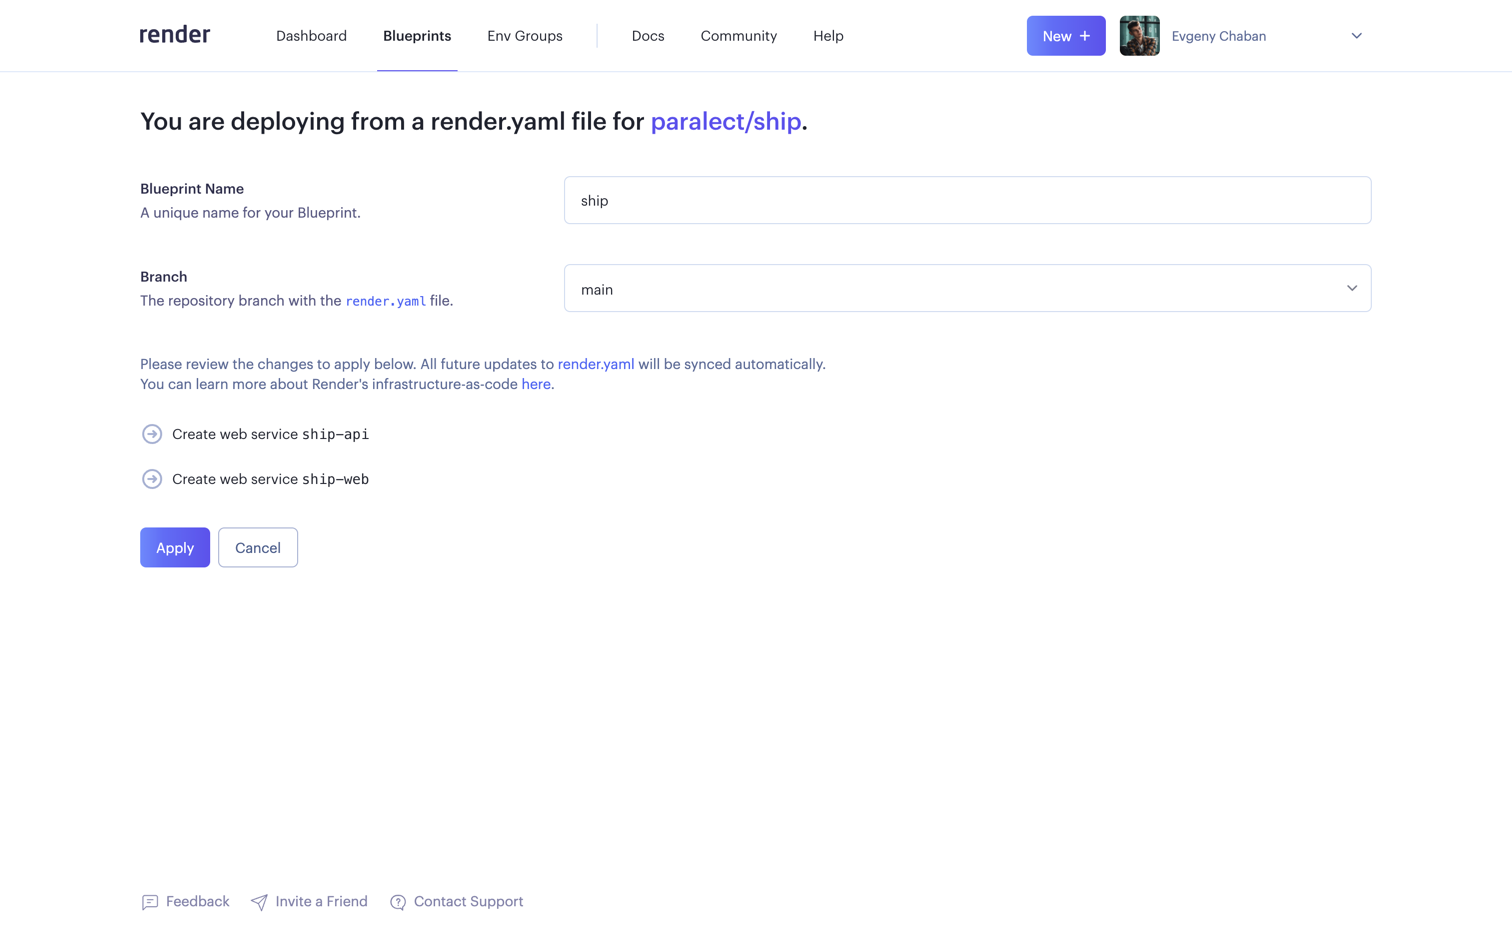
Now navigate to **Dashboard**, select your instance of *Web Service* and select the **Environment** tab in the sidebar.
Here you need to pass only one variable - `APP_ENV`.
Make sure that your web application has up-to-date environment data in the repository.
### Environment variables
The `APP_ENV` environment variable is typically set based on the environment in which the application is running.
Its value corresponds to the specific environment, such as "development", "staging" or "production".
This variable helps the application identify its current environment and load the corresponding configuration.
For the web application, by setting the environment variable `APP_ENV`,
the application can determine the environment in which it is running and load the appropriate configuration file:
| APP\_ENV | File |
| ----------- | ---------------- |
| development | .env.development |
| staging | .env.staging |
| production | .env.production |
These files hold the client config for each environment. The web app is built with Vite, so client-side variables are prefixed with `VITE_` and read through `import.meta.env` (for example `VITE_API_URL`, `VITE_WS_URL`, `VITE_WEB_URL`). They are baked in at build time, so make sure the values in your `.env.{environment}` files are up to date and committed before you deploy.
In contrast, the API utilizes a single `.env` file that houses its environment-specific configuration.
This file typically contains variables like API keys, secrets, or other sensitive information.
To ensure security, it's crucial to add the `.env` file to the `.gitignore` file,
preventing it from being tracked and committed to the repository.
So just specify the environment variables that will contain the values of your secrets.
For example, if you have a secret named `API_KEY`,
create an environment variable named `API_KEY` and set the value of the corresponding secret for it.
Now navigate to **Dashboard**, select your instance of *Web Service* and select the **Environment** tab in the sidebar.
Here you need to pass only one variable - `APP_ENV`.
Make sure that your web application has up-to-date environment data in the repository.
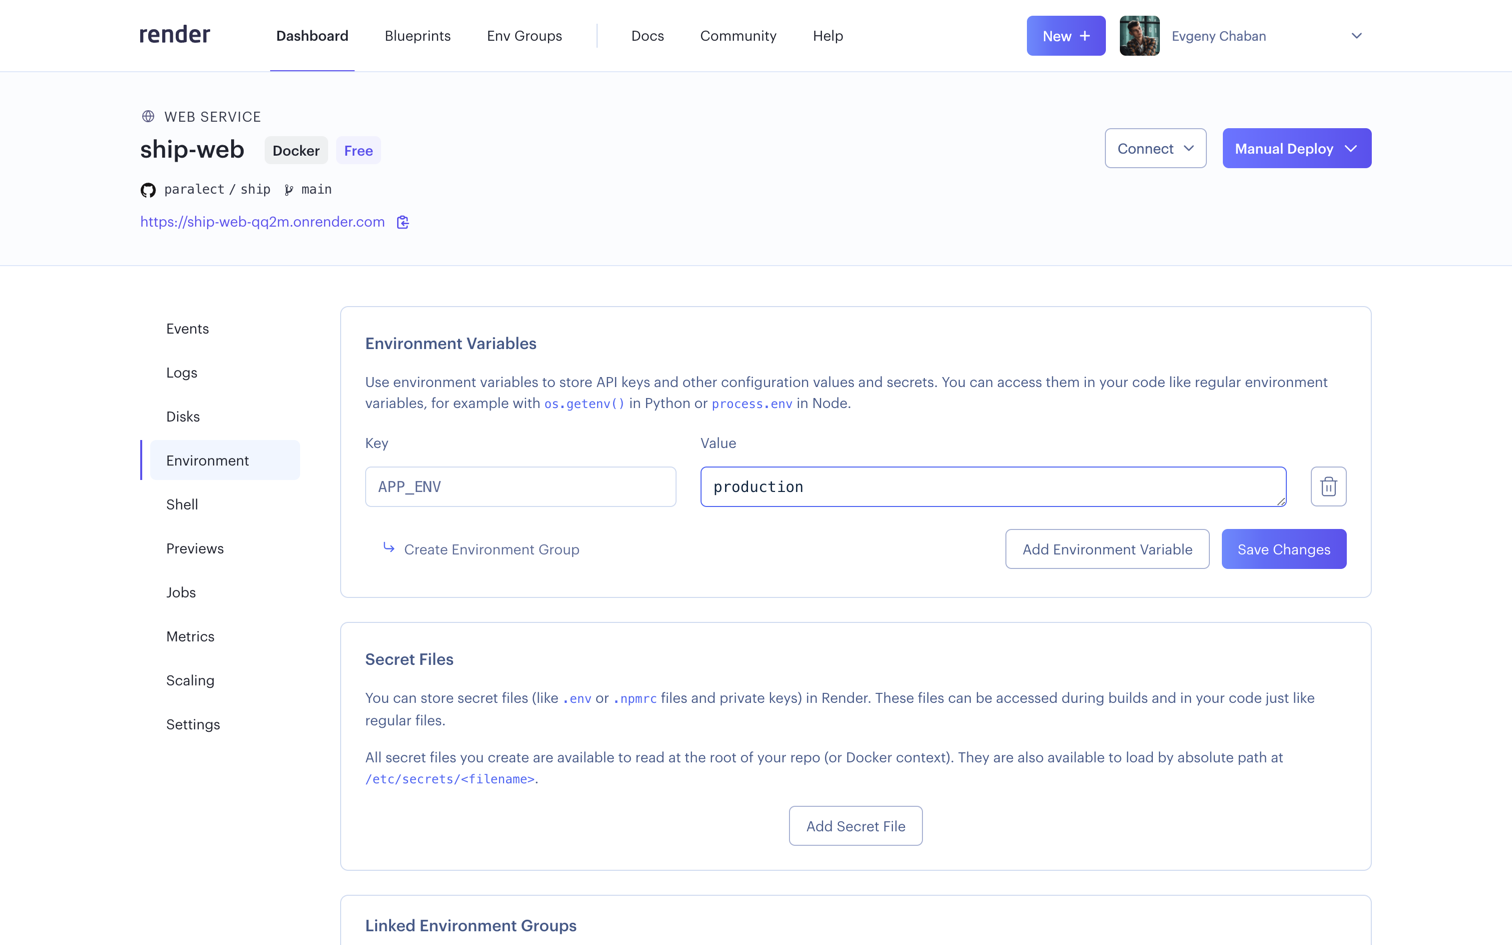 In the same way, open your *API Service* instance and add the variables it needs. At a minimum set `DATABASE_URL` to the PostgreSQL connection string you copied earlier and `REDIS_URI` to your Redis connection string. The same values are required by the Migrator and Scheduler services, so add them there too.
## Cloudflare
Render provides an initial URL of the form `*.onrender.com` to all deployed services.
`onrender.com` is a [public suffix domain](https://publicsuffix.org/) as it’s a shared domain across
all Render services - and is done so in order to protect users from being able to read each other’s cookies.
Ship uses cookies to store tokens on the front-end side.
Therefore, you need a different domain to successfully deploy the application.
If you don't have a personal domain, you can use free solutions for educational purposes, such as
[free-domain](https://github.com/Olivr/free-domain) repository.
Navigate to your Render application and open the `Settings` tab,
scroll down to the `Custom Domains` section and click the `Add Custom Domain` button.
In the same way, open your *API Service* instance and add the variables it needs. At a minimum set `DATABASE_URL` to the PostgreSQL connection string you copied earlier and `REDIS_URI` to your Redis connection string. The same values are required by the Migrator and Scheduler services, so add them there too.
## Cloudflare
Render provides an initial URL of the form `*.onrender.com` to all deployed services.
`onrender.com` is a [public suffix domain](https://publicsuffix.org/) as it’s a shared domain across
all Render services - and is done so in order to protect users from being able to read each other’s cookies.
Ship uses cookies to store tokens on the front-end side.
Therefore, you need a different domain to successfully deploy the application.
If you don't have a personal domain, you can use free solutions for educational purposes, such as
[free-domain](https://github.com/Olivr/free-domain) repository.
Navigate to your Render application and open the `Settings` tab,
scroll down to the `Custom Domains` section and click the `Add Custom Domain` button.
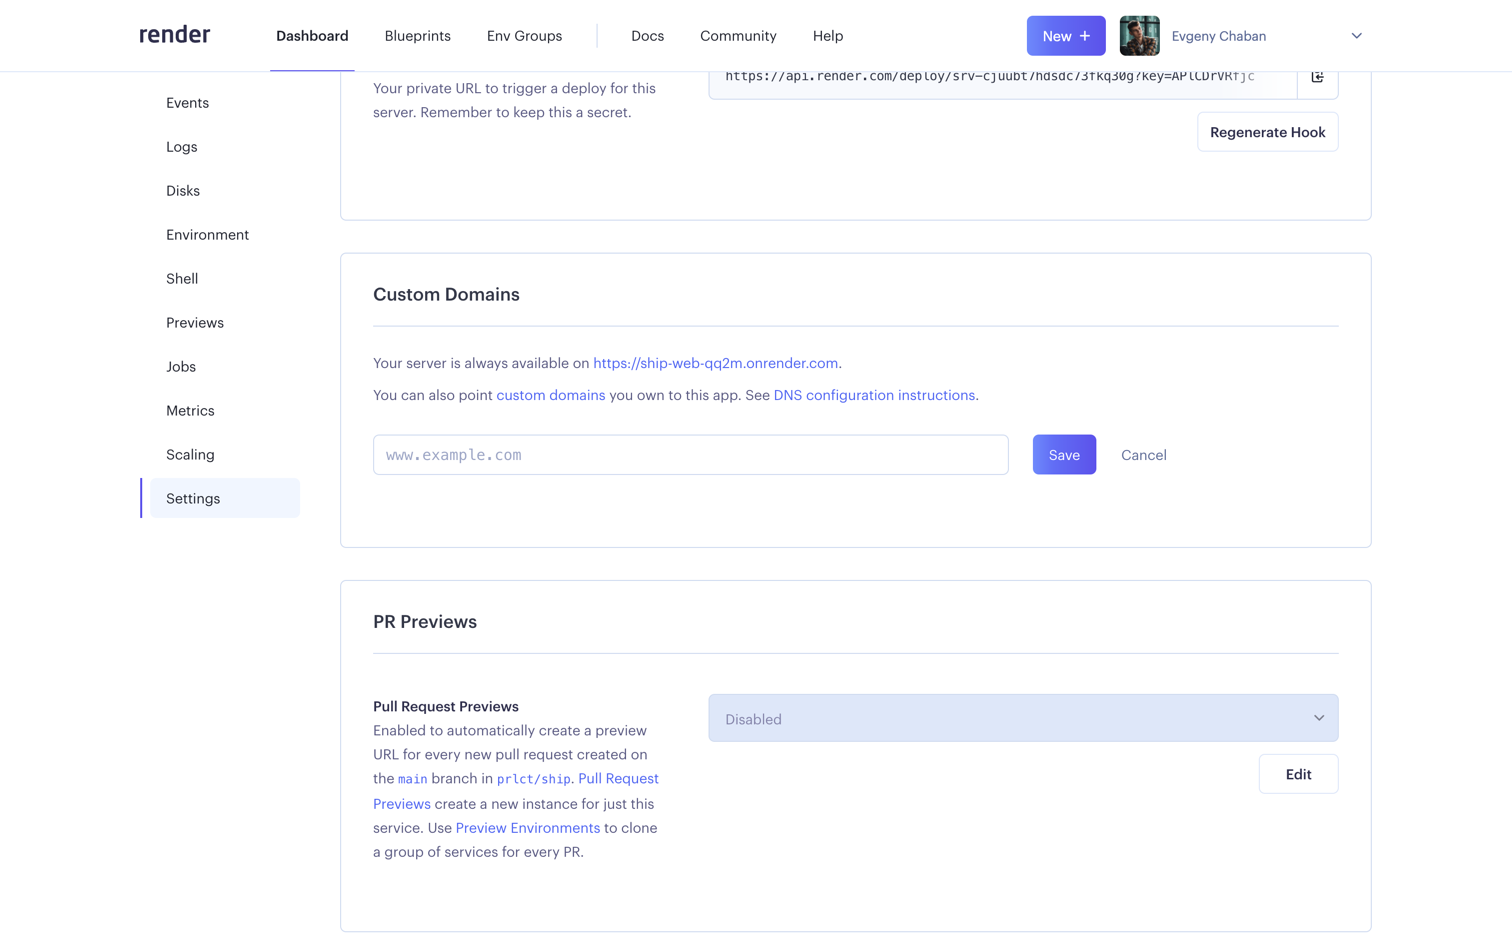 Type your desired domain and click the `Save` button.
After adding a new custom domain, you need to add a `CNAME` record in your DNS provider.
Copy this alias for your app and move on.
Type your desired domain and click the `Save` button.
After adding a new custom domain, you need to add a `CNAME` record in your DNS provider.
Copy this alias for your app and move on.
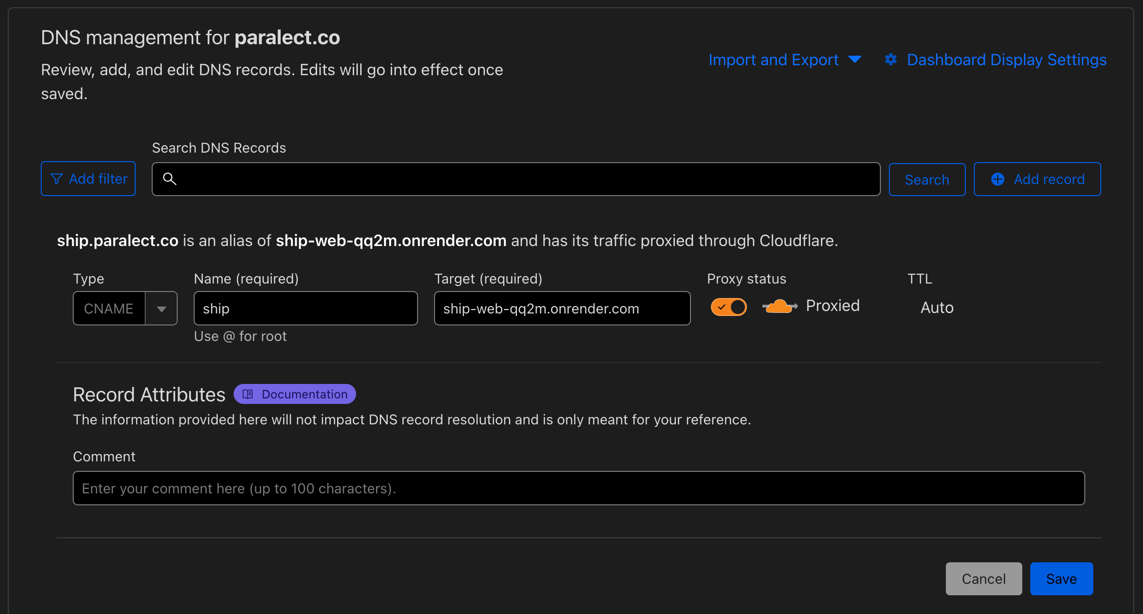
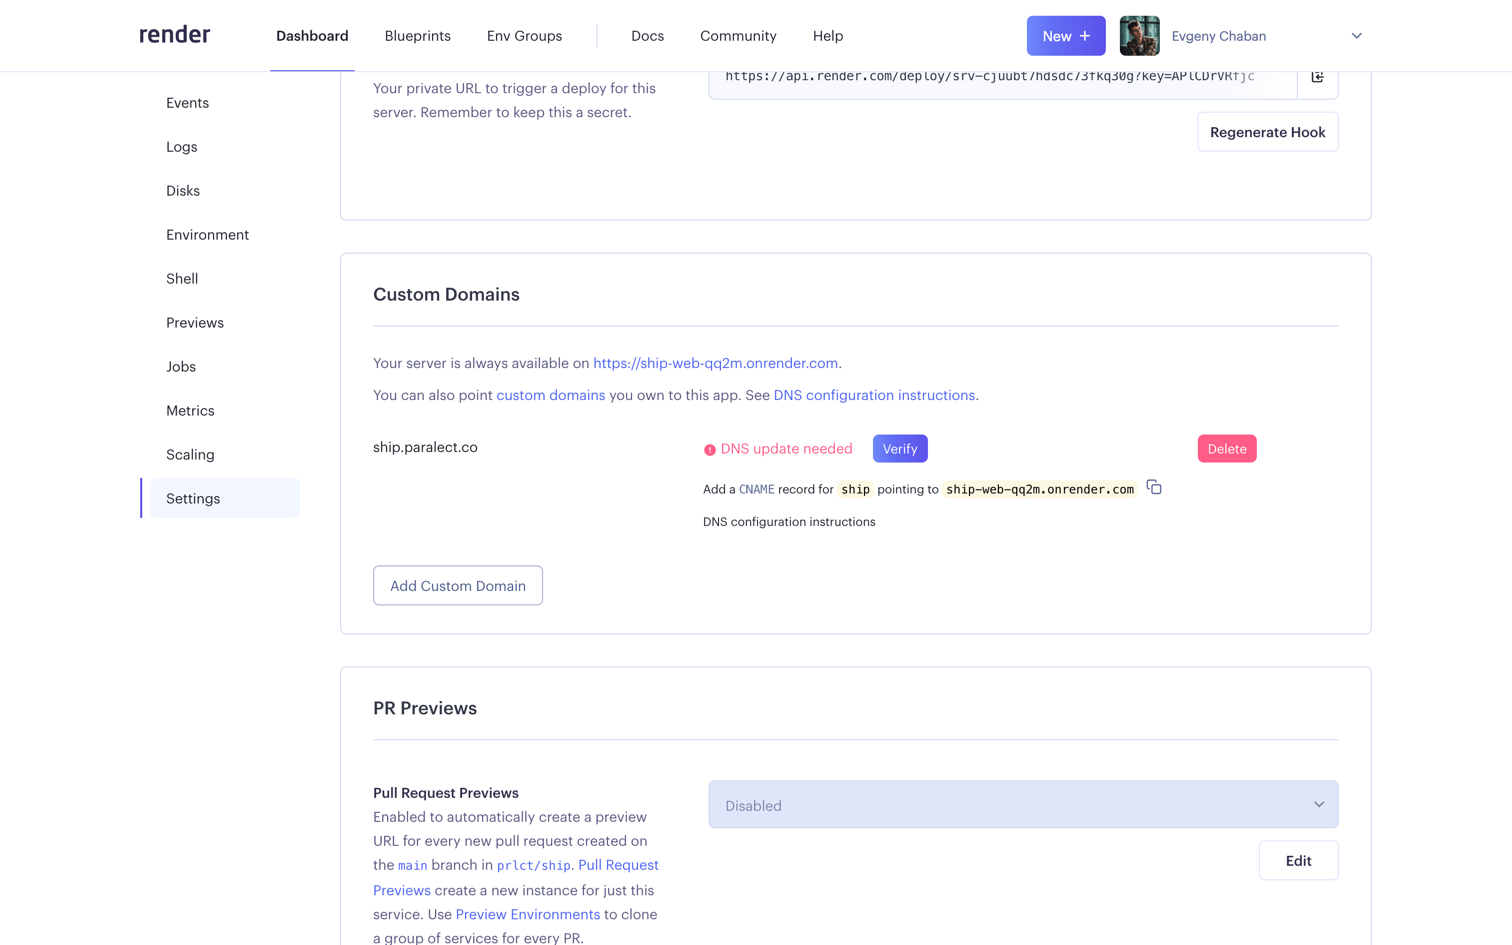 Navigate to [CloudFlare](https://dash.cloudflare.com/) and sign in to account.
1. Go to `DNS` tab and create a new record.
2. Click `Add record`. Select type `CNAME`,
enter domain name (must be the same you entered in Render settings) and paste alias into `target` field.
Make sure `Proxy status` toggle enabled.
3. Save changes
Navigate to [CloudFlare](https://dash.cloudflare.com/) and sign in to account.
1. Go to `DNS` tab and create a new record.
2. Click `Add record`. Select type `CNAME`,
enter domain name (must be the same you entered in Render settings) and paste alias into `target` field.
Make sure `Proxy status` toggle enabled.
3. Save changes
 Now go back to Custom Domains Settings and click the `Verify` button.
It usually takes about 5 minutes for Render to confirm your domain and issue a certificate and start using your new domain.
Once the domain is confirmed, application can be accessed by new address.
Now make sure you have up-to-date environments in your API and Web applications.
Now go back to Custom Domains Settings and click the `Verify` button.
It usually takes about 5 minutes for Render to confirm your domain and issue a certificate and start using your new domain.
Once the domain is confirmed, application can be accessed by new address.
Now make sure you have up-to-date environments in your API and Web applications.